Ok, so I haven't mentioned it here yet, but I'm pregnant. Yay me! We are so excited. This will be our fourth babe and things seem to be shifting around in there already so it's time to get creative and make some maternity shirts since all the ones in the thrift stores are UGLY and SUCK! I know this is mostly a vintage blog, but if I started a new blog every time I got into something new, started a new hobby or had a new thought, I'd go crazy, and believe me, you do NOT want to see me go crazy! Anyway, so I made a shirt, and it's super duper easy, but modifiable enough that any level of pregnant seamstress would enjoy herself. I'm going to attempt to explain my steps the best I can, but I suck at tutes sometimes so if you have any questions, feel free to ask :)
Here goes!

Grab a shirt that fits you well in the bust and arms from your closet or from a thrift store (this one came from my closet), plop it on, grab a marker and mark a few inches below your bust, or where your baby belly kinda starts..

Lay out your shirt and neatly line up the edges, grab a straight edge and make a nice line to cut on...

Now, slice that baby off!

Now, grab your sewing machine that has been sitting on the shelf for the last 10 years, see it back there with a red cover on it? Yeah, that one. Grab it, dust it off and thread it.

Now for the sewing...turn your shirt inside out and fold the bottom over about half inch to make a casing for your elastic. Tee shirt material doesn't fray so just use a straight stitch. Make sure to leave about an inch open to feed the elastic through.

Now stretch some elastic above your belly to "measure" how much elastic you'll need, cut it to length.

Now you'll need to feed the elastic through the casing. I usually use a safety pin, but I didn't have one so I improvised with a paper clip. Feed it all the way through, sew the two ends of the elastic together, then close up the hole in the casing. If you're on track with me, your shirt should look like this:

Now try it on for giggles.

Yep, it falls just where I wanted it to. rock on
 Now, grab some fabric from your stash, if you have no stash get thee to your local thrift store, I got this on a 50% off day for a dollar something. It's textured, light cotton fabric. It was a curtain panel from Target....(and here is where we think positive thoughts for the poor folks who got underpaid for making this curtain in the first place). Measure your self around. I measured 40 inches under my bust/above my belly. I decided to make the back panel 20 " and the front 30". That should give me plenty of room, it may not take me to the end, but I really need something now. I also measured how long I wanted my shirt to be so I measured from under my bust and let the tape measure fall and decided 20" looked good. I added on a couple inches on both these measurements for seem allowance.
Front and back panels.

Next, I gathered the top of the front panel, I did about 10 gathers at about an inch each. I totally eyeballed it. I'm sewing on the right side of the fabric right now.
 Back and front panels.
Now sew these together on the sides, right sides together. I used my machine's over edge stitch since I'm serger illiterate...


Ok, here is what we have. The top and the bottom need to be sewn together. I racked my brain as to how to do this for some reason. I'm not a complete dummy when it comes to sewing, but I don't do it often and this is one of the things I get stuck on often....like fractions in math, ya know? Anyway, sew them, right sides together with the top inside the bottom upside down. I'm unsure as to why I didn't get a pic of that. Next time I will and I'll add it in this tute. In any case, if you mess up...

...like me and turn your shirt right side out and your ugly seam is on the outside, you can fix it with a french seam.

Seam on the outside (wrong)

This is me working. My daughter took it. Aren't I hot in the morning?
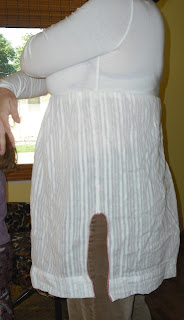
I added some expanders on the sides (yes, that it a scientific sewing term, look it up). Just cut a slit (I actually cut a whole chunk out of the fabric, it looks ugly to me, so I'll just cut a slit next time)up the sides about 3-4 inches:
I added some expanders on the sides (yes, that it a scientific sewing term, look it up). Just cut a slit (I actually cut a whole chunk out of the fabric, it looks ugly to me, so I'll just cut a slit next time)up the sides about 3-4 inches:

I stopped the slit from freying with a short zig zag stitch which I went over two times to make it look better.


All done.
Side View.
Side View.

Front.

It's a little lower cut than I'd like, but that was the result of the french seam that I hadn't planned on. Still I think it's cute and it'll be even cuter the bigger I get. I'm not much of a white gal, so I'll go for more color next time since I've got the basic construction laid out in front of me.
That's that. Let me know what you think or if I need to explain something better for you :)
That's that. Let me know what you think or if I need to explain something better for you :)


5 comments:
i see a baby belly!!!
excellent tutorial... you rock!
you are just amazing! I have craft envy towards you right now!!
(and I love your little baby belly!!)
Very lovely!!
thank you so much for posting this. It has really help me to make some tops for my niece.
I cannot thank you enough for posting this. I know it's from a while ago, but I just found it. I'm not due for another 7 months, but I'm already looking for fun maternity wear and not finding much. I can't wait to make this!
Post a Comment